
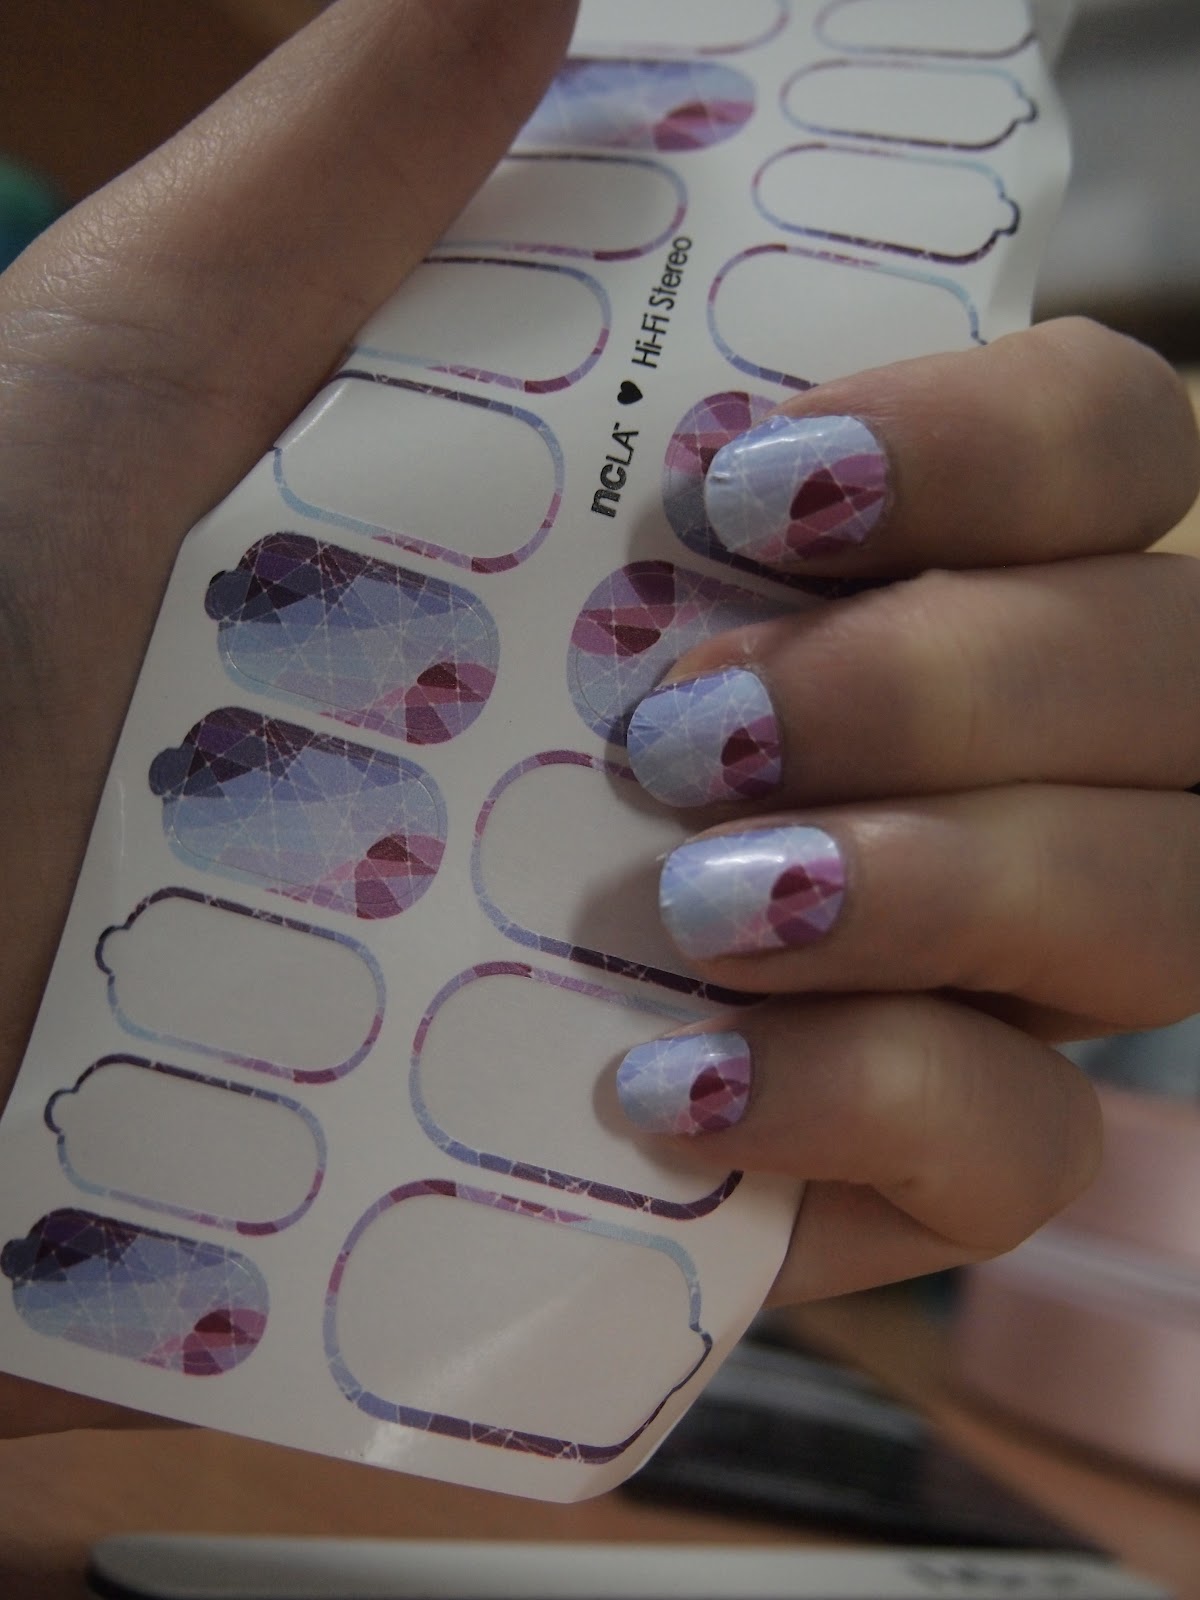
As seen in the blog title, I did my nails using the NCLA Self-Adhesive Designer Nail Wraps.

I am horrid at painting my nails, so there is no chance of me being able to do nail art myself. Luckily, there are products like the Sally Hansen Salon Effects Real Nail Polish Strips that I reviewed here and this NCLA Self Adhesive Designer Nail Wraps that have done all the hard work for me.


This product comes with 2 sheets with 22 nail wraps on each of them, as well as a NCLA emery board/nail file.

The instructions and information on the back of the packaging.


First step: I cleaned my nails using some Cutex Quick and Gentle nail polish remover, then I applied one coat of OPI natural nail base coat (applying a base coat is a must!!)

Step 2,3 and 4: Select a nail wrap that matches your nail size, stick it on and try to flatten it.
Lastly, buff off the edge with an emery board/nail file. Repeat on all nails and apply base coat.
I am not very good at selecting the right size for my nails, since many ended up being too small. It's not very obvious once applied though. This nail wrap can be stretched a little so I managed to flatten out some of the bumps near the edges that you can clearly see in the previous photo.


This nail wrap is SO EASY to remove. All you need to do is peel it off!!
The reason you must apply a base coat is due to the fact the nail wrap is removed via peeling, so you don't want the nail wrap to stick directly on your nails because if you peel it then, it will be quite damaging.
My thoughts and comparison with the Sally Hansen Real Nail Polish Strips:
I have always liked the idea of nail wraps and polish strips, mainly due to the fact that these products do not require much dry time unlike regular polishes (I absolutely hate waiting for polishes to dry). The application of this product is very easy, even much easier than the Sally Hansen Polish Strips. This one is not as flimsy as the Sally Hansen polish strips and if you are not happy with it the first time you stick it on, you can peel it off and readjust the position without ruining the nail wrap. In addition, the NCLA nail wraps come in so many cool designs!! I had a very hard time choosing which one I wanted. On top of that, this product is in a similar price point to the Sally Hansen polish strips (or a few dollars more), but it comes with 44 nail wraps whereas the Sally Hansen one only has 16 strips. Nail wraps also do not stain your nails, so no more icky yellow nails when you remove your polish!
One thing I don't like about this product is that it is not particularly long wearing. Tip wear begins to show on the 3rd day and most of my nails have chipped by day 6.
I am going to bombard you with more selfca photos than usual since I had quite a nice selfca day and I ended up having so many photos that I really like.


If you are interested in purchasing this product, you can find it on NCLA's official website where all designs are listed for $16. However, I bought mine from karmaloop.com and the price for NCLA nail wraps there ranges from $10-16. I am not advertising or endorsing NCLA or karmaloop.com in any way, I am just sharing this information just in case some of you might want to know where to get them.
This is it from me this time. Please follow me on twitter at http://twitter.com/lizchewy and/or weibo http://www.weibo.com/lizchewy
Until next time xoxo


nice review,
ReplyDeletei think i'm gonna check their web about the shipping to my country
xo
www.jiglycious.com
that's really cool :) you have nicely shaped nails btw.
ReplyDeleteJoyce @ carouselstreet.com
That's so cute, I love it!
ReplyDelete*Enter my Romwe Giveaway here: http://madridforniagirl.blogspot.com.es/2012/07/romwe-giveaway-special-leggings.html*
Love this post! I have been wanting to try nail strips, but haven't yet.
ReplyDeleteHmm, I think it's cool it can be stretched :D
Love the nails though, it's cute! :D
Thanks Liz for your awesome comment on my first NIY nail tutorial post♥!
Eliza
these are so cool! I love yours
ReplyDeleteI've never tried nail wraps before but have always wanted to
That nail design is really cool. I have never tried this before, now I really want to!
ReplyDeletebacktofive.blogspot.com
backtofive.blogspot.com
backtofive's twitter
they look amazing on!
ReplyDeletethis looks great, I've been always kind of scared to try this since I don't know how it comes off, but from what you said it sounds good as long as you do it right! I have to give this a try!
ReplyDeleteHow cute!! I love it!
ReplyDeletememoriesoftimespast.blogspot.com
wow, amazing nails!
ReplyDeletehttp://mesmemosphotoblog.blogspot.com/
thanks for reviewing this! i've always wondered how they worked. i didn't know you needed the base coat but that makes total sense! it just sucks that it doesn't last so long :(
ReplyDeleteI should try this self-adhesive nail.. It's so freaking cute!!! :)
ReplyDeleteThe Passion of Fashionista
http://thepassionoffashionista.blogspot.com.au/
That's so cool; a very effective look. I've wanted to try something like this for a long time.
ReplyDeleteThey are so pretttty! And I am the same, very impatient when it comes for waiting for nail polish to dry. I bought OPI's drip dry thing and even that was too long for me. I suck at painting my nails and tend to go crazy with the number of coats. Definitely want to try this out!
ReplyDeleteThanks Liz for your comment on my #2 NIY ombre nails! :D
ReplyDeleteI love it!! the pattern is so glam <3
ReplyDeletewww.myladyboudoir.blogspot.com
Love the pattern! xo
ReplyDeletewow..so cute!!!kiss kiss
ReplyDeleteoh i love it! i've been wanting to try those adhesive nail polishes but i never get the chance to.
ReplyDeleteWin a $50 giftcard to Shappy Apple! Come and join. :]
:)
Carrie
http://readmylifeascarrie.blogspot.com/
nice post girl..! <3 i want it sooo bad... realy want to get my nail polish just like that <3
ReplyDeletego visit my blog if you're interested dear :) mind to follow me back? (:
I need to buy something similar, i like the pattern you have selected!
ReplyDeleteDon't Call Me Fashion Blogger
Bloglovin'
Facebook
that's damn good, the nails are so fine!!
ReplyDeletewww.thewild-swans.com
cool really pretty look. yea i think i would not be so good at doing these myself either but i have to try at least once. i really like the print of these and the great thing with nail wraps is that they let you try out so many different patterns that are just not achievable with polish. good thinking with the clearcoat underneath i probably would have forgotten that!
ReplyDeletexx rae
loveforschoolgirl.net
That's so cool....i've never tried this type of nail art before but I definitely should - it looks fast and stylish!
ReplyDeleteI really like the design on these.
ReplyDeleteThe design on those are super cute! I've never tried them because I'm so fond of painting my nails and having fun with nail art. But I def gotta give them a try for lazy days.
ReplyDeletehttp://jadeintheskies.blogspot.com
wow it's pretty nice ;)
ReplyDeletexx
http://maybe-not2day.blogspot.com/
your nails look beautiful :) seriously, one of the best nail wrap designs I've seen! thanks for the tut too :)
ReplyDeletemetallicpaws.blogspot.com
Thanks you so much for your latest comment on my blog dear!
ReplyDeleteIt made me so happy!
Great post! So useful!
Huge hugs and have a great day Gittemary.blogspot.com
Facebook.com/thepictureofmary
Youtube.com/user/gittemary
Thank you for the comment you left on my blog! :)
ReplyDeleteThis is a cute design!
Natasha Carly x
http://prettylittlelives.blogspot.co.uk
this is actually cute! gotta try this next time
ReplyDeleteWWW.FASHIONGEEKSCLOSET.COM
JOIN MY GIVEAWAY! (Exclusive for Indonesian-based readers)
I love the pattern! I love nail stickers :) these are very pretty!!
ReplyDeleteLove the idea of this and the design is so nice!! I didn't try nail wraps until now because I thought it has to feel... strange.. on the nail. Or something like that :) But nice design that you chose!
ReplyDeleteAmazing nails ! The design are wonderfull ! <3
ReplyDeleteThat is such a pretty and unique print! The intricacy of the design is definitely something that would be extremely difficult to replicate on the actual nail. I like that the removal process is to easy - just peel it off! I can see why the base coat would be a must in that case :)
ReplyDeletenoooo they don't have your print left.....i'm in love with it. Like a stained glass, kaleidoscope, one colour many shades print. Gorgeous.
ReplyDeletexx
Couture Caddy
I love the pattern you chose. So pretty! I'm rubbish at painting my nails as well so I need to try these strips out.
ReplyDeleteRowena @ rolala loves
indeed, i love your nails! i really want to try on these stick on nail designs. they look really cool! this design looks great and wow, you can just peel it off? that's a lot easier than removing nail polish ;_; great review!
ReplyDeletealex @ carouselstreet.com
It looks amazing! really have to try this :)
ReplyDeletexx
N.
http://nikadressed.blogspot.com/
This is an intesting tutorial! Love it!
ReplyDeleteReally nice design. I have been wanting to try these! but I always have acrylic nails. I think I need to just go ahead and purchase some lol
ReplyDeletewow so cool!!! love this post!
ReplyDeletehttp://fashion-gourmet.blogspot.com/
Oh these are pretty cool
ReplyDeleteactually, since I'm not
a huge fan of doing my
own nails haha!
You look cute c:
xx
Cute nail pattern!
ReplyDeleteI tried these before and mines fell off the next day :( THey have lots of cute patterns but it's a shame it didn't work for me.
Great tutorial and the end result is fantastic.
ReplyDeletehttp://monstermagpie.blogspot.com/
The design of this one is really cute! I have tried one of the Sally hansen ones, but I think mine must have been old and dried up a bit because it didn't stick very well to my nailbed. But then again I didn't use a basecoat. Maybe that would have helped it adhere better...
ReplyDeleteThose stick on nails look nice~ You have a nice nail bed =)
ReplyDeleteI don't do much with my nails, I hardly wear nail polish other than nude french manicure shades..
Love your nails
ReplyDeleteGreat Blog
Great tutorial!!! I bought a set of golden nail sticker too but I haven't dare to try it yet!!! I am very bad at doing my nails but after reading your tutorial, I think i will try it :)
ReplyDeleteang-closet365.blogspot.ca
Wow! That really helped thanks! xxx
ReplyDeleteI am glad that you found this post helpful. Thanks for reading ^-^
ReplyDelete